This is a sponsored post brought to you by Skins 4 Minecraft.
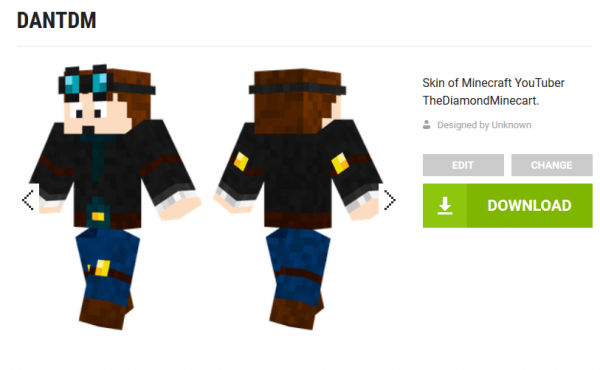
Looking for a way to jazz up your game of Minecraft? Well, did you know that you can install a whole new skin? Yes, that’s right – you can play as pretty much anyone in the world – real or fictional. Sounds fun to you? Well, then the prospect of using a DanTD skin will surely make you a bit happier! Read the below instruction if you want to find out how to download and install it! Plus, we personally think that it is one of the best ones that we have!
But who is that Dan TDM guy that we are promoting? Well, if you didn’t know already, he has about 18.9 million subscribers on his YouTube channel that are all from around the world. They religiously watch his videos, which turned out into his videos having been viewed 10.6 billion times. So what does he do in these little videos of his? He plays video games. Does that sound fun to you? It sure does to us!
When he was a boy, Dan Middleton used to dread having to talk to people and being in the spotlight. Even as he got older and started making his videos on a more professional level,andquit his job at the supermarket – he still felt the same. He says that he was much more comfortable when it was just him and a camera in his room over the garage, and this is where we could see what an easy person he actually is.
We simply cannot see why you would not want to download a DanTD Minecraft skin. Go on and do that!
So, now that you know who is behind this skin, you can learn how to download it!
How to download a Minecraft skin
Step 1.Launch your web browser of choice from the Start menu, desktop, or taskbar on the device you play on.
Step 2.Navigate to the main page of https://skins4minecraft.com/.
Step 3.Type ‘Dan TDM skin’ into the search bar and wait for the page to download the skin.
Step 4.Click on the ‘Download’ button which is the big green one on the right side of the page of a certain skin. Make sure that the file you are downloading is in the png format.
Step 5.Click ‘Save’. Please do not forget to make sure that you remember the folder you have downloaded your new skin into.
How to upload a skin into the game of Minecraft
Now that you are done with that, you can proceed to upload it into Minecraft! Here’s a step-by-step on how to do this.
Step 1.Launch Minecraft from your desktop, Start menu, or taskbar.
Step 2.Click the hanger icon which is located beneath the avatar of your character.
Step 3.Click the blank model, which is beneath the ‘Default’ field.
Step 4.Click ‘Choose New Skin’.
Step 5.Navigate to your Downloads folder or to the one you have saved your new custom skin into.
Step 6.Click on the skin file you want to upload.
Step 7.Click the ‘Open’ button.
Step 8.Click the model type that you think looks best.
Step 9.Click ‘Confirm Skin’.
Congratulations! You now have a fantastic new look.
This is a sponsored post brought to you by Skins 4 Minecraft.


